
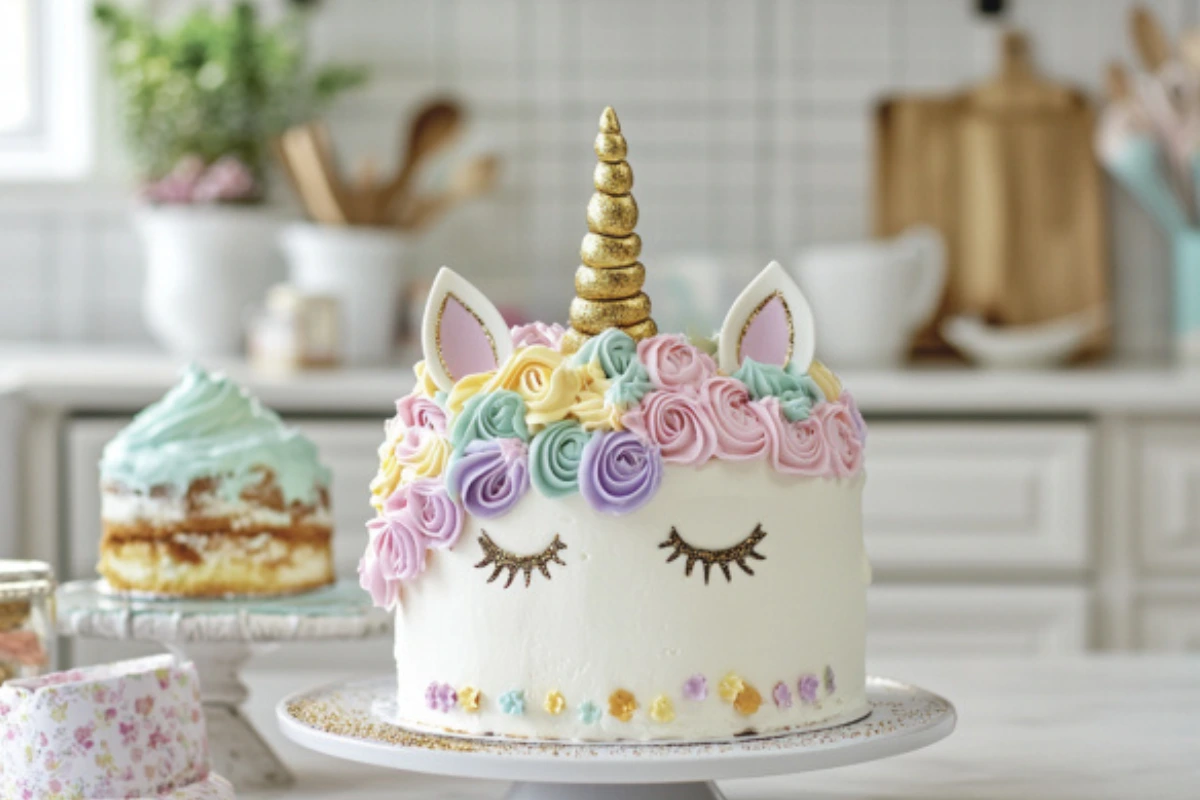
Unicorn cake has taken the world by storm, becoming a must-have for magical celebrations and charming birthday parties. Adorned with pastel hues, sparkling decorations, and the signature horn, these cakes are more than sweet treats—they’re stunning centerpieces that bring a sense of wonder to any event.
Whether planning a child’s birthday party, a baby shower or simply indulging in a creative baking project, this cake is the perfect centerpiece. The good news? Creating one isn’t as daunting as it seems!
In this guide, we’ll take you through the step-by-step process of making a stunning unicorn cake. From baking the perfect cake layers to crafting edible decorations like a glittering horn and a colorful buttercream mane, you’ll have all the tools, tips, and inspiration you need to create a magical masterpiece.
So, roll up your sleeves, grab your piping bags, and transform your kitchen into a magical cake-making wonderland!
Table of Contents

What You’ll Need to Make a Unicorn Cake
Ingredients for the Cake Base
The base is as important as the decorations when making a unicorn cake. A delicious, well-structured cake ensures your unicorn cake masterpiece is visually stunning and a hit with everyone who tastes it. Here’s what you need to create the perfect base for your magical unicorn cake:
1. Vanilla Sponge Cake Mix or Homemade Recipe
- Why Vanilla?
- Vanilla is a neutral, crowd-pleasing flavor that pairs well with colorful decorations and sweet buttercream, making it ideal for a unicorn cake.
- Options: Use a boxed vanilla cake mix for convenience, ensuring it’s light and fluffy.
- Prepare a simple batter using flour, sugar, eggs, milk, butter, and vanilla extract for a homemade version.
- Pro Tip:
- Add a teaspoon of almond extract alongside vanilla for a subtle, nutty undertone that enhances the flavors of your unicorn cake.
2. Food Coloring for Rainbow or Pastel Layers
- Gel Food Coloring:
- Gel-based colors are ideal as they provide vibrant hues without thinning the batter, essential for achieving a unicorn cake’s beautiful layers.
- Suggested Colors: Soft pastels for a dreamy, whimsical look (pink, lavender, light blue, mint green).
- Bright rainbow tones for a playful, vibrant unicorn cake effect.
- How to Use: Divide the batter evenly into separate bowls and add a small amount of food coloring. Stir gently to maintain the batter’s airiness and ensure each layer of the unicorn cake is flawless.
3. Butter, Sugar, and Egg
- Butter:
- For optimal flavor and texture, use unsalted butter. Ensure it’s at room temperature to allow for smooth creaming, a crucial step in making the batter for your unicorn cake.
- Sugar:
- Granulated sugar works well, but superfine sugar can help achieve a smoother batter, perfect for a light, fluffy unicorn cake.
- Eggs:
- Fresh eggs at room temperature blend more easily into the batter, ensuring a uniform texture in your unicorn cake.
4. Baking Powder and All-Purpose Flour
- Baking Powder:
- This is the leavening agent that makes the cake rise. Ensure fresh for the best results so your unicorn cake layers bake evenly.
- All-Purpose Flour:
- Provides structure to the cake. You can substitute cake flour for a softer crumb, ideal for creating a tender unicorn cake.
- Pro Tip:
- Sift the flour and baking powder together before adding them to the batter. This prevents lumps and ensures an even rise, which is crucial for a perfectly baked unicorn cake.
5. Milk or Buttermilk
- Why Use Milk?
- Milk adds moisture and creates a tender crumb, enhancing the texture of your unicorn cake.
- Why Buttermilk?
- Buttermilk can make the cake even softer and add a subtle tang that balances the sweetness of a unicorn cake.
- Pro Tip:
- If you don’t have buttermilk, mix one tablespoon of lemon juice or white vinegar with a cup of milk and let it sit for 5 minutes. This quick substitute works perfectly in a unicorn cake recipe.
6. Optional Add-Ins for Extra Flavor
- Vanilla Bean Paste: For a more potent, aromatic vanilla flavor with specks of real vanilla, add a gourmet touch to your unicorn cake.
- Zest: Add lemon or orange zest for a refreshing citrus note that complements the sweetness of a unicorn cake.
- Sprinkles: Mix colorful sprinkles into the batter for a fun-fetti-style unicorn cake, making every slice a delight.
These ingredients form the foundation of a magical unicorn cake. Whether you go for a simple boxed mix or a fully homemade batter, following these tips ensures your cake layers are moist, flavorful, and ready for their magical transformation. Let me know if you want additional baking tips for your unicorn cake! 😊
This version incorporates the focus keyword naturally and strategically, avoiding overuse. Feel free to let me know if you’d like any additional adjustments!
1. Cake Pans (for Layered Cakes)
- Size and Quantity:
- 6-inch or 8-inch round cake pans are ideal for a unicorn cake.
- Use at least three pans for a multi-layered effect, especially if incorporating rainbow or pastel-colored layers.
- Why They Matter: Using multiple pans allows you to bake each color layer separately, avoiding the need to slice a thicker cake, which can be tricky.
2. Parchment Paper or Baking Liners
- Purpose:
- Lining the bottom of your cake pans prevents the cake from sticking and ensures easy removal after baking.
- It also helps maintain the shape of each layer without crumbling.
- Pro Tip: Trace the cake pan on parchment paper and cut to size for a perfect fit.
3. Cake Turntable
- Why Use a Turntable?
- A turntable allows you to smoothly frost and decorate your unicorn cake by rotating it as you work.
- It’s beneficial for achieving even frosting and precise piping designs.
- Alternative: Use a flat, sturdy surface like a lazy Susan if you don’t have a turntable.
4. Offset Spatula and Bench Scraper
- Offset Spatula:
- This is perfect for spreading frosting evenly across the cake’s layers and sides.
- The angled design prevents your hands from touching the cake while working.
- Bench Scraper:
- Use this tool to smooth the sides of the cake for a clean, professional finish.
- It’s beneficial when creating a flawless buttercream base for decorations.
5. Piping Bags and Tips
- Essential for Decorating:
- Piping bags create the unicorn’s mane, rosettes, and other details with buttercream.
- Include a variety of piping tips, such as star tips, round tips, and petal tips, for different designs.
- Pro Tip:
- Use reusable piping bags for an eco-friendly option or disposable ones for easy cleanup.
6. Fondant Tools
- Fondant Roller:
- A smooth rolling pin designed for fondant ensures even thickness when creating decorations like the unicorn horn and ears.
- Cutting Tools: Use fondant cutters or sharp knives for precise shapes.
- Modeling Tools: Sculpting tools help add details to the fondant, such as texturing the unicorn horn or shaping delicate features.
7. Measuring Cups and Spoons
- Why Precision Matters:
- Accurate measurements are crucial for the success of your cake batter and frosting.
- Use a digital kitchen scale for even greater precision, especially when dividing batter for colored layers.
8. Cooling Racks
- Purpose:
- Cooling racks allow your cake layers to cool evenly after baking.
- Prevents sogginess by letting air circulate the cake.
- Pro Tip:
- Wait until the layers are completely cool before frosting to avoid melting the buttercream.
9. Edible Glitter and Sprinkles Applicators
- Why They Help:
- Use small tweezers or brushes to precisely place edible glitter, sprinkles, or small decorations.
- This is especially useful for intricate details around the mane and horn.
10. Cake Board or Stand
- Cake Board:
- Place your cake on a sturdy board to make it easier to transport.
- Choose a board slightly larger than your cake for a clean look.
- Cake Stand: Use a decorative stand to elevate and display your finished cake for a dramatic effect.
11. Mixing Bowls and Whisks
- Mixing Bowls:
- Use several bowls to mix different colored batters and frostings.
- Choose non-reactive materials such as glass or stainless steel.
- Whisks and Spatulas: Whisks help ensure a smooth batter, while silicone spatulas are great for scraping every bit of batter or frosting.
12. Toothpicks or Skewers
- Usage:
- Toothpicks are great for testing if the cake is fully baked (insert in the center; it should come out clean).
- Use skewers to support the fondant unicorn horn and secure it on the cake.
Gathering these tools and equipment before starting’ll save time and ensure a stress-free baking and decorating experience. Let me know if you’d like suggestions for budget-friendly alternatives or additional tips for using these tools effectively!
Decorating Supplies
The decoration supplies transform a basic cake into a magical unicorn masterpiece. Choosing the right materials and tools allows you to create vibrant, whimsical details that bring the unicorn theme to life. Here’s an expanded list of essential decorating supplies and tips for using them effectively:
1. Edible Glitter
- Why It’s Important:
- Edible glitter adds a magical sparkle to your unicorn cake, making it visually enchanting.
- It’s perfect for highlighting specific areas, such as the unicorn horn, mane, or frosting details.
- Tips for Use:
- Sprinkle glitter lightly over the cake for a subtle shimmer, or apply generously to create a dazzling effect.
- Use a small, clean brush to precisely apply the fondant horn or ears.
2. Fondant for Decorations
- Why Fondant is Key:
- Fondant is ideal for sculpting detailed decorations like the unicorn horn, ears, and eyes.
- It provides a smooth, polished finish that elevates the cake’s appearance.
- Tips for Use:
- Choose white fondant with gel food coloring to create custom shades.
- Roll out fondant on a non-stick surface dusted with powdered sugar to prevent sticking.
- Use gold or silver edible dust to add a metallic sheen to the horn and other accents.
3. Gel Food Coloring
- Why Gel is Better:
- Gel food coloring produces vibrant hues without altering the consistency of the frosting or fondant.
- Suggested Colors: Pastel shades: Pink, lavender, mint green, baby blue, and yellow for a dreamy unicorn theme.
- Bright tones: Rainbow colors for a bold and playful look.
- Tips for Use:
- Add color gradually using a toothpick to control intensity.
- Mix colors thoroughly to avoid streaks in the batter, frosting, or fondant.
4. Piping Bags and Tips
- Essential for the Mane:
- Use piping bags to create the unicorn’s mane with buttercream frosting in various colors.
- Star, round, and petal tips are great for creating rosettes, swirls, and textured effects.
- Tips for Use:
- Fill each piping bag with a different frosting color.
- Practice on parchment paper to perfect your designs before applying them to the cake.
5. Sprinkles and Sugar Pearls
- Why They’re Useful:
- Sprinkles and sugar pearls add fun textures and pops of color to your cake.
- They’re great for embellishing the mane, edges, or even the base of the cake.
- Tips for Use:
- Coordinate sprinkle colors with the cake’s overall theme for a cohesive look.
- Apply sprinkles immediately after piping the frosting to ensure they stick.
6. Edible Metallic Paints or Dusts
- Why They’re Magical:
- Edible metallic paints or dusts add a luxurious, shiny finish to decorations like the horn, ears, and eyes.
- Tips for Use:
- Use a small brush to apply metallic paint directly to fondant details.
- For dust, mix it with a few drops of clear alcohol or lemon extract for easy application.
7. Cake Topper Accessories
- Why They Elevate the Cake:
- Pre-made unicorn toppers (horns, ears, and eyes) can save time and ensure a professional look.
- DIY Option:
- Craft your own horn and ears using fondant or modeling chocolate.
- Draw and cut out eyes from edible wafer paper or use a food-safe marker on fondant.
8. Edible Markers
- How They Help:
- Edible markers are great for adding fine details, like eyelashes or outlines on fondant shapes.
- Tips for Use:
- Use black or brown edible markers to draw elegant, curved eyelashes on the unicorn’s face.
- Test the marker on a small fondant before applying it to the cake to ensure smooth lines.
9. Ribbon or Trim for the Cake Board
- Why It’s Important:
- A decorative ribbon or trim around the edge of the cake board enhances the overall presentation.
- Tips for Use:
- Match the ribbon color to the cake’s theme for a polished look.
- Secure the ribbon with double-sided tape or food-safe adhesive.
10. Floral Decorations (Optional)
- Why They Add Elegance:
- Small edible flowers like sugar or fresh blooms can complement the unicorn theme.
- Tips for Use:
- Ensure fresh flowers are non-toxic and food-safe.
- Place flowers strategically around the mane or base of the cake for added charm.
11. Stencils for Extra Details
- Why Stencils Work:
- Stencils help create intricate patterns or designs on the sides or top of the cake.
- Tips for Use: Use stencils with edible luster dust or royal icing for a clean, professional effect.
Pro Tips for Success
- Organize your decorating supplies before you start to avoid interruptions during the process.
- Practice key decorations, like the horn or rosettes, on a spare surface before applying them to the cake.
- Store leftover supplies, such as fondant or frosting, properly to maintain freshness for future projects.
These decorating supplies ensure your unicorn cake is delicious and a magical centerpiece for any occasion. Let me know if you’d like more detailed guidance.
Step-by-Step Instructions to Bake the Unicorn Cake Base
Preparing the Batter
Creating a delicious and visually stunning unicorn cake starts with preparing the perfect batter. This step lays the foundation for vibrant, fluffy cake layers that will wow your guests. Here’s an in-depth guide to preparing the batter for your unicorn cake:
1. Gather Your Ingredients
Before mixing, ensure you have all your ingredients measured and ready. This is crucial for a smooth workflow and to guarantee the success of your unicorn cake. Here’s what you’ll need for a standard vanilla batter (adjust quantities based on your recipe):
- Flour: Sifted to remove lumps for a lighter texture.
- Sugar: Granulated or superfine for a smoother batter.
- Baking Powder: Helps the cake rise and gives it structure, resulting in fluffy unicorn cake layers.
- Eggs: Bring to room temperature for smoother incorporation into the batter.
- Butter: Softened, unsalted butter for creaminess and flavor, perfect for a unicorn cake base.
- Milk or Buttermilk: Adds moisture and creates a tender crumb.
- Vanilla Extract: Enhances the flavor and aroma of your unicorn cake.
- Food Coloring: Gel-based colors are ideal for vibrant, even tones, which are essential for creating the iconic unicorn cake look.

2. Mixing the Wet Ingredients
- Cream the Butter and Sugar: Beat softened butter and sugar until the mixture is pale, fluffy, and creamy. This step incorporates air into the batter, ensuring your unicorn cake is light and airy.
- Add the Eggs: Incorporate the eggs individually, ensuring each one is well mixed before adding the next. This helps prevent curdling and ensures a smooth batter for your unicorn cake.
- Incorporate Vanilla Extract: Stir in vanilla extract or vanilla bean paste for a rich flavor profile that enhances the overall taste of your unicorn cake.
3. Mixing the Dry Ingredients
- Combine and Sift: Sift together the flour, baking powder, and a pinch of salt in a separate bowl. Sifting aerates the flour and removes lumps, creating a smoother texture for your unicorn cake layers.
- Gradual Addition: Add the dry ingredients to the wet mixture gradually, dividing them into three portions. Alternate with milk (or buttermilk), starting and ending with the dry ingredients. Mix on low speed to avoid overworking the batter, which can result in a dense unicorn cake.
4. Dividing and Coloring the Batter
Once the batter is prepared, it’s time to divide and color it to create the vibrant layers that define a unicorn cake:
- Divide the Batter: Evenly distribute the batter into separate bowls, one for each color you plan to use. Use a kitchen scale to ensure equal portions for uniform unicorn cake layers.
- Add Food Coloring: Use gel food coloring for bold, consistent colors without altering the batter’s texture. Add a small amount at a time and mix thoroughly to achieve your desired shade for each layer of your unicorn cake.
- Suggested Colors: Pastels like pink, lavender, mint green, and light blue, or bold rainbow hues to capture the magic of a unicorn cake.
- Test the Colors: Dab a small amount of each colored batter onto parchment paper to see how it looks once baked.
5. Mixing Tips for Perfect Batter
- Avoid Overmixing: Mix just until the ingredients are combined. Overmixing can develop the gluten in the flour, leading to a tough unicorn cake.
- Scrape the Bowl: Use a spatula to scrape down the sides and bottom of the mixing bowl to incorporate all ingredients evenly.
- Check the Consistency: The batter should be smooth, thick, and pourable. If it’s too thick, add a tablespoon of milk at a time until the consistency is right for your unicorn cake.
6. Preparing for Baking
- Grease and Line Cake Pans: Lightly grease the cake pans with butter or baking spray. Line the bottom with parchment paper for easy removal, ensuring flawless unicorn cake layers.
- Pour the Batter: Gently pour each colored batter into its respective pan. Smooth the tops with a spatula to ensure an even bake for your unicorn cake layers.
By carefully following these steps, your batter will be well-prepared, and your unicorn cake layers will bake evenly with vibrant, flawless colors. Let me know if you’d like tips for decorating or additional ways to personalize your unicorn cake!
Baking the Layers
Baking the cake layers is crucial in creating a visually stunning and perfectly textured unicorn cake. Proper baking techniques ensure your layers are even, moist, and vibrant in color. Follow this detailed guide to bake flawless layers for your masterpiece:
1. Preheating the Oven
- Why It’s Important: Preheating the Oven ensures it reaches the correct temperature before you place your cake inside, allowing for even baking from the start.
- Temperature Settings:
- Set your Oven to 350°F (175°C) for most vanilla sponge cake recipes.
- For darker or nonstick pans, consider lowering the temperature to 325°F (160°C) to prevent over-browning.
- Tips: Use an oven thermometer to verify the temperature inside your Oven, as built-in settings can sometimes be inaccurate.
2. Preparing the Cake Pans
- Greasing the Pans: Lightly coat the sides and bottom of your cake pans with butter, shortening, or nonstick spray to prevent sticking.
- Lining with Parchment Paper:
- Cut a circle of parchment paper to fit the bottom of each pan. This makes it easier to remove the baked layers without damaging them.
- Even Distribution: Pour the colored batter into each prepared pan, ensuring the layers are of equal thickness for consistent baking.
3. Arranging Layers in the Oven
- Rack Placement: Position the oven rack in the center of the Oven for even heat circulation.
- Spacing the Pans:
- If baking multiple layers at once, leave at least 2 inches of space between the pans and the oven walls for proper airflow.
- Avoid overcrowding to prevent uneven baking.
- Batch Baking: If you Bake in batches, if you can’t accommodate all the pans at once, bake in the remaining batter with plastic wrap and keep it at room temperature until ready to bake.
4. Baking Time
- General Guidelines:
- Most 6-inch or 8-inch cake layers bake in 20-30 minutes.
- Start checking for doneness at the 20-minute mark.
- Signs of Doneness:
- The edges of the cake should slightly pull away from the pan.
- The top should spring back when gently pressed.
- Test the cake by inserting a toothpick or skewer into its center; it’s done if it comes out clean or with a few moist crumbs.
- Tips for Even Baking:
- Turn the pans midway through baking to promote even browning.
- Avoid opening the oven door too often, which can cause temperature fluctuations and uneven rising.
5. Cooling the Layers
- Initial Cooling in the Pan: Allow the baked layers to cool in their pans for 10-15 minutes. This helps the cake firm up slightly, making it easier to handle.
- Transferring to Cooling Racks:
- Run a knife or offset spatula around the edges of each pan to loosen the cake.
- Turn the cakes onto a wire cooling rack and gently peel off the parchment paper.
- Let the layers cool completely before frosting to prevent the buttercream from melting.
6. Optional: Trimming and Leveling the Layers
- Why It’s Important: Leveling the layers ensures the cake stacks evenly, preventing a lopsided or unstable final product.
- Tools Needed: Use a serrated knife or a cake leveler for precise trimming.
- How to Do It:
- Gently slice off domed tops to create a flat surface.
- Save the trimmings to snack on, or use them to make cake pops!
7. Troubleshooting Common Issues
- Uneven Layers: Use a digital kitchen scale to weigh out the batter evenly before pouring it into the pans.
- Overbrowning: Cover the top of the cake with foil during the last few minutes of baking to prevent excessive browning.
- Sticky Cake Bottoms: Ensure you’ve greased and lined the pans correctly with parchment paper.
8. Storing the Layers (If Needed)
- Short-Term Storage: If you plan to assemble the cake the same day, wrap the cooled layers in plastic wrap to keep them moist.
- Long-Term Storage:
- For extended storage, wrap the layers tightly in plastic wrap and aluminum foil, then place them in the freezer.
- Allow thawing at room temperature for 1-2 hours before decorating.
Baking the layers to perfection is the key to a successful unicorn cake. These vibrant, even, moist layers will set the stage for magical decorations. Let me know if you’d like more tips or advice on troubleshooting specific baking issues!
Leveling and Stacking the Layers
Once your cake layers are baked and cooled, leveling and stacking them correctly is essential for creating a stable and professional-looking unicorn cake. This step ensures the cake is even, balanced, and ready for frosting and decorating. Here’s a detailed guide to help you perfect this process:
1. Why Leveling is Important
- Stability: Uneven layers can make the cake wobbly and challenging to decorate.
- Appearance: A leveled cake looks polished and professional.
- Even Frosting: Level layers help achieve smooth, consistent frosting between each tier.
2. Tools You’ll Need for Leveling
- Serrated Knife: A long serrated knife is excellent for trimming uneven tops.
- Cake Leveler: This tool ensures precise and even cuts across all layers.
- Turntable: Makes it easier to rotate the cake while trimming.
- Offset Spatula: Helps to spread frosting evenly after leveling.
3. How to Level Your Cake Layers
- Cool Completely: Ensure the cake layers are thoroughly cooled before leveling. Warm cakes are more likely to crumble.
- Place on a Turntable: Position a layer on the turntable to make trimming more straightforward and precise.
- Mark the Cutting Line:
- Use a knife to lightly score the cake where you plan to trim off the domed top.
- Alternatively, set a cake leveler to the desired height and use it to guide your cut.
- Trim Carefully:
- Hold the serrated knife parallel to the cake’s surface and slowly sew back and forth, rotating the cake as you cut.
- For a cake leveler, gently glide it through the cake to remove the dome.
- Check for Evenness: Once leveled, check the surface by placing a straight edge or ruler on top. Adjust if necessary.
4. Stacking the Cake Layers
Now that your layers are leveled, it’s time to stack them to create a stable base for decorating.
- Prepare a Cake Board or Stand:
- Start with a sturdy cake board or stand slightly larger than your Cake.
- Spread a small dollop of frosting on the center of the board to hold the bottom layer in place.
- Position the Bottom Layer:
- Place the first cake layer on the board with the leveled side facing up.
- Ensure it’s centered for balance.
- Apply Frosting Between Layers:
- Use an offset spatula to spread an even layer of buttercream or filling across the top.
- Avoid overloading the frosting, as too much can cause instability.
- Optional: Create a frosting dam around the edge to hold softer fillings in place (e.g., jam or custard).
- Repeat with Remaining Layers:
- Place the next layer on top, leveled side down, to ensure a flat surface for the next tier.
- Continue frosting and stacking until all the layers are assembled.
5. Crumb Coating the Stacked Cake
- What is a Crumb Coat?
- A thin layer of frosting is applied over the entire Cake to seal it in crumbs.
- How to Apply It:
- Spread a thin layer of frosting around the stacked Cake using an offset spatula.
- Smooth the frosting with a bench scraper to create a clean base.
- Chill the Cake for 15-30 minutes to set the crumb coat before applying the final layer of frosting.
6. Tips for Perfectly Stacked Layers
- Check Alignment: After adding each layer, step back and ensure the Cake is straight and aligned. Adjust as needed.
- Use Dowels for Support (Optional): If your Cake is tall or heavy, insert food-safe dowels into the center of the Cake for added stability.
- Avoid Pressing Too Hard: Gently press each layer into place to avoid squishing the frosting or causing the Cake to collapse.
7. Troubleshooting Common Stacking Issues
- Sliding Layers:
- Use a thicker consistency frosting to prevent sliding.
- Chill the Cake briefly by adding layers to help the frosting firm up.
- Uneven Stacks:
- Double-check that each layer is leveled correctly before stacking.
- Rotate the Cake to ensure it remains centered.
- Crumbly Edges: Trim any crumbly edges during the leveling process to keep the Cake clean and neat.
By leveling and stacking your layers carefully, you’ll set the stage for a beautiful, stable unicorn cake ready for frosting and magical decorations. Let me know if you need additional tips for achieving the perfect base!
Decorating Your Unicorn Cake Like a Pro
Creating the Unicorn Horn and Ears
The unicorn horn and ears are the centerpiece of your unicorn cake, adding that whimsical and magical touch. Crafting these decorations carefully ensures they stand out as stunning, professional-looking details. Here’s a step-by-step guide to creating the perfect unicorn horn and ears:
1. Materials You’ll Need
To create the horn and ears, gather these essential materials:
- Fondant: White fondant for the horn and ears (or pre-colored fondant).
- Gel Food Coloring: Gold or pastel colors for accents.
- Edible Glitter or Metallic Dust: Adds sparkle and a magical finish to the horn and ears.
- Toothpicks or Skewers: Provide structure for the horn and secure it in place on the Cake.
- Rolling Pin: This is for shaping and flattening fondant.
- Small Knife or Fondant Cutter: To trim fondant with precision.
- Paintbrush: For applying edible glitter or metallic dust.
2. Creating the Unicorn Horn
The unicorn horn is the focal point of the Cake, representing magic and fantasy. Follow these steps to craft it:
- Roll the Fondant:
- Knead white fondant until soft and pliable.
- Roll it into a long, thin log approximately 6–8 inches long.
- Taper one end of the log to create a pointed tip for the horn.
- Twist into Shape: Fold the fondant log in half and gently twist the two halves together.
- Continue twisting until the entire length resembles a spiral horn.
- Insert a Skewer or Toothpick:
- Push a toothpick or skewer into the center of the horn, leaving enough exposed to anchor it securely in the Cake.
- This ensures the horn stays upright and stable.
- Paint and Add Glitter:
- Mix edible gold or silver dust with a few drops of clear alcohol (e.g., vodka) or lemon extract to create a metallic paint.
- Use a paintbrush to apply the metallic paint to the horn.
- Sprinkle edible glitter over the horn while the paint is still wet for added sparkle.
- Let It Dry:
- Allow the horn to dry and harden for at least 1–2 hours (or overnight for best results).
- This ensures it maintains its shape when placed on the Cake.
3. Crafting the Unicorn Ears
The ears frame the horn and complete the unicorn’s face. Here’s how to make them:
- Shape the Ears:
- Roll out white fondant to about 1/8-inch thickness using a rolling pin.
- Cut two ear shapes, approximately 2 inches tall, resembling elongated teardrops.
- Add Inner Details:
- Roll out pink fondant (or another complementary color) for the inner ear sections.
- Cut smaller teardrop shapes to fit inside the white ears.
- Use a small amount of water or edible glue to attach the pink pieces to the center of the white ears.
- Add Texture (Optional): Use a fondant modeling tool or knife to create subtle indentations or folds in the ears for a more realistic look.
4. Arranging the Horn and Ears on the Cake
- Placement:
- Insert the horn into the center of the Cake’s top surface. Ensure it’s upright and stable.
- Position the ears on either side of the horn, angling them slightly outward for a cute, balanced look.
- Additional Decorations:
- Surround the horn and ears with piped buttercream rosettes or swirls to create a flowing mane.
- Add edible flowers, pearls, or sprinkles around the horn and ears for extra charm.
5. Tips for Success
- Work Quickly: Fondant can dry out if left exposed to air. Cover unused portions with plastic wrap or store them in an airtight container.
- Support Larger Horns: For a taller or heavier horn, use a thicker skewer or a food-safe plastic dowel for added stability.
- Experiment with Colors: Use pastel shades or metallic accents to match your unicorn cake’s theme.
- Practice First: If you’re new to working with fondant, practice shaping the horn and ears on a flat surface before making the final pieces.
By carefully crafting the unicorn horn and ears, you’ll create a striking and magical centerpiece that brings your unicorn cake to life. Let me know if you need more tips or alternative methods for these decorations!
Frosting and Piping the Mane
The unicorn mane is one of the most eye-catching elements of a unicorn cake, adding vibrant colors and whimsical texture. Perfecting the frosting and piping process ensures your Cake looks magical and professional. Here’s a detailed guide to help you create a stunning mane:
1. Preparing the Buttercream Frosting
The buttercream frosting is the base for your unicorn mane. To make it perfect:
- Make a Smooth Buttercream:
- Ingredients: Unsalted butter, powdered sugar, vanilla extract, and a small amount of heavy cream or milk.
- Beat the butter until creamy and pale, then gradually add powdered sugar. Mix until fluffy.
- Adjust the consistency: Add more sugar for stiffness or cream for a softer texture.
- Divide and Color the Frosting:
- Divide the buttercream into bowls, one for each color you’ll use in the mane.
- Use gel food coloring to achieve vibrant hues without altering the consistency.
- Suggested colors: Pastel pink, lavender, mint green, baby blue, and yellow for a dreamy unicorn mane.
- Prepare the Piping Bags:
- Fit piping bags with various tips (e.g., star, rosette, and leaf tips) for different textures.
- Fill each bag with a different color frosting, ensuring there’s no air trapped inside.
2. Frosting the Cake Base
Before piping the mane, ensure the Cake has a smooth layer of frosting as a base:
- Apply the Crumb Coat:
- Apply a thin coat of buttercream across the entire Cake to lock in the crumbs.
- Use an offset spatula to smooth out the frosting evenly.
- Refrigerate the Cake for 15-30 minutes to allow the crumb coat to set.
- Final Frosting Layer:
- Spread a thicker layer of frosting on top of the crumb coat
- Use a bench scraper to smooth the sides and top of the Cake.
- Ensure the surface is flawless, as it serves as the canvas for the mane.
3. Piping the Unicorn Mane
Once the Cake is frosted and smooth, you can begin creating the mane:
- Plan the Mane Design:
- The mane typically starts at the top of the Cake near the horn and flows down the side.
- You can also add more minor details about the ears or base of the Cake.
- Piping Rosettes and Swirls:
- Use a star tip to pipe rosettes and swirls in various colors.
- Apply consistent pressure to the piping bag as you work, releasing pressure at the end of each rosette or swirl.
- Alternate colors and sizes for a dynamic, layered effect.
- Adding Texture:
- Use a petal tip to create ribbons or cascading waves.
- Add small details like dots or stars with a round tip for contrast.
- Pipe leaves or other accents with a leaf tip to add variety.
- Blending Colors (Optional):
- For a gradient effect, fill a piping bag with multiple colors side by side.
- This creates a multi-toned swirl when piped, adding depth to the mane.
4. Adding Finishing Touches
To elevate the mane and make it truly magical:
- Edible Glitter and Sprinkles:
- Lightly dust edible glitter over the mane for sparkle.
- Add small sprinkles or sugar pearls strategically for extra texture and charm.
- Edible Flowers: Place small edible flowers along the mane for a whimsical, floral touch.
- Candy or Fondant Accents: Use small candies or fondant decorations, like stars or hearts, to complement the mane’s theme.
- Highlight the Horn and Ears: Extend the mane around the base of the unicorn horn and ears to integrate them seamlessly into the design.
5. Tips for Successful Piping
- Maintain Consistent Pressure: Keep the pressure steady while piping to ensure uniform designs.
- Practice First: Test your piping techniques on parchment paper before working on the Cake.
- Chill the Cake if Necessary: If the frosting becomes too soft, chill it briefly to firm it up.
- Wipe the Tips: Clean your piping tips between colors to avoid mixing hues unintentionally.
6. Troubleshooting Common Issues
- Runny Frosting: If the buttercream is too soft, refrigerate it for 10–15 minutes to firm up.
- Uneven Piping: Rotate the Cake on a turntable while piping to ensure smooth and even designs.
- Color Bleeding: Use high-quality gel food coloring to prevent colors from running or fading.
With these steps, your unicorn cake’s mane will be a stunning display of color and texture, bringing your magical creation to life. Let me know if you’d like additional tips or advice on piping techniques!
Adding Final Details
The final details on your unicorn cake bring the entire creation to life, adding character, charm, and that magical touch. These finishing touches make your Cake look professionally crafted and genuinely enchanting. Here’s a comprehensive guide to perfecting the final details for your unicorn cake:
1. Placing the Horn and Ears
The horn and ears are the focal points of the unicorn’s face, so their placement is crucial:
- Position the Horn:
- Insert the prepared horn (with its skewer or toothpick) into the center of the Cake’s top surface.
- Ensure the horn is straight and stable. If it wobbles, secure it with additional support or reposition it.
- Add the Ears:
- Position the ears on either side of the horn, angling them slightly outward for a playful look.
- Press the skewers or toothpicks into the Cake until the ears feel secure.
- Seamless Integration: Use buttercream rosettes, swirls, or fondant flowers around the horn and ears to blend them into the main design.
2. Creating the Unicorn’s Face
The face is a defining feature of the unicorn cake and adds personality to the design:
- Drawing the Eyes:
- Use black fondant or edible markers to create closed eyes with long, curved lashes.
- Roll small pieces of black fondant into thin ropes, shaping them into eye outlines with delicate lashes.
- Attach the fondant eyes to the Cake using a tiny amount of water or edible glue.
- Adding Cheeks: Roll small circles of pink fondant or use a dab of pink buttercream to create blushing cheeks below the eyes.
- Highlighting Features: Use edible glitter or metallic dust to add sparkle to the cheeks, eyes, or lashes for a whimsical effect.
3. Enhancing the Mane
The mane is already piped with colorful swirls and rosettes, but additional accents can elevate the design:
- Sprinkles and Sugar Pearls:
- Add sprinkles or sugar pearls in complementary colors throughout the mane for texture and sparkle.
- Cluster sprinkles around key areas like the base of the horn or along the flowing mane.
- Edible Flowers:
- Place small edible flowers (real or sugar-crafted) within the mane for a soft, elegant look.
- Consider pastel hues to match the unicorn theme.
- Multi-Color Piping: Use a piping bag filled with multiple colors of frosting to create a gradient or rainbow effect for added depth.
4. Decorating the Cake Base
The base of the Cake is often overlooked but can be used to tie the design together:
- Ribbon Trim:
- Wrap a pastel or metallic ribbon around the edge of the cake board for a polished appearance.
- Buttercream Borders:
- Pipe small dollops, stars, or shells around the base of the Cake for a clean finish.
- Use the same colors as the mane to maintain a cohesive look.
- Sprinkle Scattering: Scatter a few sprinkles or edible glitter around the base of the Cake for a magical touch.
5. Adding Edible Glitter and Metallic Accents
Glitter and metallic accents give the Cake a luxurious, magical appearance:
- Dusting Glitter: Lightly dust edible glitter over the entire Cake, focusing on the horn, mane, and base.
- Metallic Highlights: Use edible metallic paint or luster dust to add gold or silver accents to the horn, ears, or piping details.
- Glow Effect: Apply a subtle shimmer to the frosting using pearl dust for an ethereal glow.
6. Final Touches for a Personal Touch
Make your unicorn cake truly unique with personalized details:
- Name or Age: Add the recipient’s name or age using fondant letters or piped buttercream. Place them on the Cake or the cake board.
- Topper Options: Include a custom cake topper, such as “Happy Birthday” or “Magical Wishes,” in a glittery design.
- Custom Colors: Incorporate the recipient’s favorite colors into the mane or accents to make the design more personal.
7. Presentation and Display
The way you present the Cake adds to its magical appeal:
- Cake Stand: Display the unicorn cake on a pastel or metallic cake stand to elevate its appearance.
- Lighting: Use soft or fairy lights around the cake table for a magical ambiance.
- Coordinated Decor: Match the cake table decorations (e.g., tablecloths, napkins, or banners) with the unicorn theme to create a cohesive display.
8. Troubleshooting Final Details
- Unstable Decorations: Ensure all fondant elements are well-supported with toothpicks or skewers and have dried adequately before placing them on the Cake.
- Color Smudges: Handle decorations carefully to avoid smudging colors or glitter. If smudges occur, touch them up with fresh buttercream or fondant.
- Last-Minute Adjustments: Make final checks before presenting the Cake to ensure every detail is in place.
By carefully adding these final details, your unicorn cake will be transformed into a magical centerpiece that’s as stunning as it is delicious. Let me know if you need more.
Unicorn Cake Ideas for Every Occasion
Birthday Party Themes
Unicorn cakes are perfect for various birthday party themes, especially for kids and those who love a touch of magic. Matching your cake with a cohesive party theme takes the celebration to the next level, creating a memorable and enchanting experience for everyone. Here’s a detailed guide to incorporating unicorn cakes into different birthday party themes:

1. Magical Unicorn Party Theme
- Overview:
- This classic theme revolves around all things unicorn: rainbows, sparkles, and whimsical decor.
- Perfect for kids who adore the magic and fantasy associated with unicorns.
- Decor Ideas:
- Colors: Use pastel shades like lavender, mint green, baby blue, soft pink, and yellow.
- Decor: Include balloons, streamers, and tablecloths in unicorn-themed prints or coordinating pastel hues.
- Centerpieces: Place unicorn figurines, glittery horns, or small rainbow decorations on tables.
- Activities:
- DIY unicorn horn crafts with headbands and glitter.
- Face painting with unicorn or rainbow designs.
- Unicorn piñata filled with candy and small toys.
- How the Cake Fits: Place the unicorn cake as the centerpiece of the dessert table, surrounded by matching cupcakes, cookies, or macarons.
2. Rainbow Wonderland Theme
- Overview:
- A rainbow theme focuses on bright, bold colors and is perfect for a vibrant celebration.
- It’s an excellent choice for adding energy and excitement to the party.
- Decor Ideas:
- Colors: Use every rainbow color in the decorations, from table settings to balloons.
- Decor: Hang rainbow banners, paper fans, and colorful garlands around the party area.
- Lighting: Incorporate LED rainbow lights or lanterns for a magical touch.
- Activities:
- Set up a “rainbow science” activity with safe, colorful experiments for kids.
- Create a rainbow scavenger hunt with small toys or treats in each color.
- How the Cake Fits:
- Make the unicorn cake with vibrant rainbow-colored layers inside to surprise guests when it’s sliced.
- Pair the cake with rainbow-themed desserts like candy skewers or rainbow-colored drinks.
3. Fairy Tale Fantasy Theme
- Overview:
- This theme combines elements of unicorns, fairies, and mythical creatures, creating a dreamy atmosphere.
- Ideal for kids who love stories of magical lands and mythical beings.
- Decor Ideas:
- Colors: Soft and natural tones like blush pink, sage green, lavender, and gold.
- Decor: Use fairy lights, mossy accents, and toadstool decorations to create a woodland feel.
- Centerpieces: Arrange floral centerpieces with small fairy figurines.
- Activities:
- Fairy wand-making with glitter and ribbons.
- Storytime featuring classic fairy tales.
- Treasure hunts for magical items like faux gems or golden coins.
- How the Cake Fits:
- Design the unicorn cake with additional fairy tale elements, like edible flowers, butterflies, or a woodland-inspired base.
- Surround the cake with fairy-inspired treats like sugar cookies shaped like stars or mushrooms.
4. Glitter and Glam Theme
- Overview:
- Focus on glitz and glamour for a more sophisticated take on the unicorn theme.
- Perfect for older kids, teens, or adults who want a stylish and sparkly party.
- Decor Ideas:
- Colors: Gold, silver, and metallic tones combined with pastel accents.
- Decor: Use sequin tablecloths, glittery centerpieces, and metallic balloons.
- Lighting: Add string lights or candles for an elegant ambiance.
- Activities:
- Glitter makeup stations with temporary tattoos or sparkly hair accessories.
- Glam photo booth with unicorn props and a shimmering backdrop.
- How the Cake Fits:
- Decorate the unicorn cake with gold or silver metallic accents, edible glitter, and a sleek pastel mane.
- Pair it with sophisticated treats like glitter-dipped cake pops or metallic macarons.
5. Outdoor Garden Unicorn Party Theme
- Overview:
- This theme combines unicorn magic with the beauty of nature, creating a serene and enchanting outdoor celebration.
- Perfect for spring or summer birthdays.
- Decor Ideas:
- Colors: Earthy tones mixed with pastels, such as green, peach, and lavender.
- Decor: Set up picnic-style seating with floral arrangements, hanging lanterns, and unicorn-themed picnic blankets.
- Natural Touches: Incorporate potted plants, garlands of greenery, and fresh flowers.
- Activities:
- Set up an outdoor craft station for painting unicorn-themed rocks.
- Host a “unicorn treasure hunt” where children search for hidden unicorn figurines or magical items.
- How the Cake Fits:
- Decorate the unicorn cake with edible flowers and greenery to match the garden theme.
- Place the cake on a rustic wooden stand or a table adorned with fresh flowers.
Tips for Tying the Unicorn Cake into Any Theme
- Cake Table Setup:
- Use a matching tablecloth, backdrop, and props to highlight the cake.
- Add signs or banners with phrases like “Magical Treats” or “Unicorn Delights.”
- Complementary Treats: Include desserts like cupcakes, cookies, or cake pops that coordinate with the cake’s design.
- Photo Opportunities: Position the cake in a well-lit area for photos and make it the centerpiece of the dessert table.
With these birthday party themes, your unicorn cake becomes more than just a dessert—a magical centerpiece that ties the celebration together. Let me know if you’d like more specific ideas for decor or activities!
Alternative Flavor Ideas
While a classic vanilla unicorn cake is a timeless and crowd-pleasing option, experimenting with alternative flavors can make your unicorn cake unique and even more exciting. Offering a variety of flavors ensures the cake not only looks magical but also tastes extraordinary. Here are some creative flavor ideas to consider for your unicorn cake:
1. Chocolate Unicorn Cake
- Why It Works:
- Chocolate is a universally loved flavor that adds richness and depth to the cake.
- It provides a delicious contrast to the sweet buttercream frosting.
- Flavor Variations: Classic Chocolate: Use cocoa powder or melted dark chocolate for a moist and indulgent cake in the batter.
- Chocolate Fudge: Enhance the cake with a fudgy filling or ganache layers for a decadent treat.
- Customization Tips:
- Use a pastel-colored frosting for the exterior to maintain the unicorn aesthetic.
- Add chocolate chips or chunks to the batter for extra texture.
2. Funfetti Unicorn Cake
- Why It Works:
- A funfetti cake is colorful, playful, and perfect for a unicorn-themed celebration.
- The sprinkles inside the cake layers mirror the magical, vibrant design of the unicorn.
- How to Make It:
- Add rainbow-colored sprinkles to a simple vanilla cake batter.
- Use non-melting sprinkles to avoid them dissolving during baking.
- Customization Tips:
- Pair with a sweet vanilla buttercream frosting and colorful sprinkles on the outside.
- Match the sprinkles inside with the colors of the unicorn’s mane.
3. Strawberry or Raspberry Unicorn Cake
- Why It Works:
- Fruity flavors like strawberry or raspberry add a refreshing and tangy twist to the cake.
- These flavors complement the sweetness of the buttercream and add a unique flavor profile.
- How to Make It:
- Use fresh fruit puree or freeze-dried fruit powder in the batter for natural flavor and color.
- Layer the cake with fruit-flavored jam or compote for extra moisture and flavor.
- Customization Tips:
- Use pink frosting or create an ombre effect with shades of pink to highlight the fruit flavor.
- Garnish with fresh berries or edible flowers for a charming, elegant look.
4. Lemon or Citrus Unicorn Cake
- Why It Works:
- Lemon or citrus flavors bring a light, zesty brightness to the cake, balancing the sweetness of the frosting.
- It’s an excellent option for spring or summer celebrations.
- How to Make It:
- Add lemon zest and juice to the batter for a tangy kick.
- Use orange, lime, or grapefruit zest for variation or a combination for a citrus medley.
- Customization Tips:
- Pair with a tangy lemon buttercream or cream cheese frosting.
- Decorate with edible flowers and pastel yellow accents to emphasize the citrus theme.
5. Red Velvet Unicorn Cake
- Why It Works:
- Red velvet is popular for its subtle cocoa flavor and striking appearance.
- DeepIt’s red adds a dramatic and unique touch to the traditional unicorn cake.
- How to Make It:
- Use a classic red velvet buttermilk and cocoa powder recipe.
- Layer the cake with cream cheese frosting for an indulgent pairing.
- Customization Tips:
- Keep the exterior pastel-colored to maintain the unicorn theme.
- Add a surprise element by revealing the bold red when slicing the cake.
6. Cookies and Cream Unicorn Cake
- Why It Works:
- Cookies and cream offers a nostalgic and indulgent flavor that appeals to kids and adults alike.
- The cookie crumbs add a delightful crunch to the cake.
- How to Make It:
- Add crushed chocolate sandwich cookies to the vanilla batter and frosting.
- Use a cookies and cream filling between the layers for extra flavor.
- Customization Tips:
- Pipe the unicorn mane with frosting, including cookie crumbs, for a speckled effect.
- Add mini cookie decorations around the base of the cake.
7. Carrot or Spice Unicorn Cake
- Why It Works:
- A carrot or spice cake brings warmth and earthy flavors for fall or winter celebrations.
- The subtle sweetness of the cake pairs wonderfully with cream cheese frosting.
- How to Make It:
- Incorporate grated carrots, cinnamon, nutmeg, and a touch of ginger into the batter.
- Add chopped nuts or raisins for additional texture, if desired.
- Customization Tips:
- Keep the exterior pastel or white to stay on the theme while the spiced flavors provide a cozy surprise.
- Use edible gold or bronze accents to complement the warm tones of the cake.
8. Coconut Unicorn Cake
- Why It Works:
- Coconut adds a tropical and unique twist to the traditional cake.
- It’s light and airy and pairs well with fruity or creamy frostings.
- How to Make It:
- Add shredded coconut and coconut milk to the batter for a moist and flavorful cake.
- Toasted coconut flakes can be used as a garnish or filling.
- Customization Tips:
- Light blue or white frosting represents the tropical theme.
- Decorate with edible flowers or candy seashells for a unique take on the unicorn design.
9. Matcha Unicorn Cake
- Why It Works:
- Matcha (green tea powder) adds a subtle, earthy flavor and a beautiful natural green hue.
- It’s a sophisticated option for adults or those who enjoy unique flavors.
- How to Make It:
- Add high-quality matcha powder to a basic vanilla batter.
- Pair with a white chocolate buttercream or cream cheese frosting for balance.
- Customization Tips:
- Decorate the cake with shades of green and pastel tones for a harmonious look.
- Use gold accents to contrast with the matcha’s natural green hue.
10. Vegan or Gluten-Free Unicorn Cake
- Why It Works:
- These options cater to dietary restrictions without sacrificing flavor or presentation.
- Great for inclusive celebrations where guests may have allergies or dietary preferences.
- How to Make It:
- Use plant-based ingredients, such as almond milk, applesauce, or flaxseed meal, for a vegan cake.
- For gluten-free, substitute traditional flour with a gluten-free baking blend.
- Customization Tips:
- Focus on vibrant colors and fresh fruits to enhance the cake’s appearance.
- Ensure all decorations, such as sprinkles or glitter, are labeled vegan or gluten-free.
By choosing an alternative flavor for your unicorn cake, you can create a dessert that surprises and delights your guests with its appearance and taste. Let me know if you’d like detailed recipes for these flavors!
Personalized Touches
Adding personalized touches to your unicorn cake makes it unique and meaningful for the occasion. Whether for a birthday, celebration, or special Event, customizing the cake ensures it reflects the personality and preferences of the guest of honor. Here’s how you can incorporate creative and thoughtful personalizations into your unicorn cake:
1. Name and Age Decorations
Adding the name or age of the birthday person makes the cake feel truly special:
- Fondant Letters:
- Roll out Fondant in a color that complements the cake’s theme.
- Use letter cutters or hand-shape letters to spell out the name or age.
- Dust the letters with edible glitter or metallic paint for a magical touch.
- Piped Buttercream:
- Use a fine round tip on a piping bag to write the name and age on the cake or cake board.
- Keep the piping consistent and neat, using contrasting colors for visibility.
- Edible Printed Toppers:
- Create or order an edible topper with the name and age in a unicorn-themed font.
- Position the topper prominently on the cake.
2. Color Customization
Personalizing the color scheme of the unicorn cake can make it extra special:
- Favorite Colors:
- Replace traditional pastel or rainbow hues with the recipient’s favorite colors.
- Incorporate these colors into the frosting, unicorn mane, and decorations.
- Ombre Effects:
- Use an ombre gradient of their chosen colors for a visually stunning effect on the mane or the cake’s sides.
- Custom Color Accents: Use edible glitter, sprinkles, or metallic accents in the recipient’s preferred shades.
3. Themed Accessories
Tailor the unicorn cake to reflect the recipient’s hobbies, interests, or the theme of the celebration:
- Hobby-Inspired Decorations:
- Incorporate elements like mini fondant books, sports equipment, or musical instruments into the design.
- For example, a music lover’s unicorn cake could include tiny fondant notes cascading down the mane.
- Event-Specific Themes:
- Customize the unicorn’s decorations to match the Event, adding tiny graduation caps for a graduation party or wedding-themed accents for a bridal shower.
- Cultural Touches: Add cultural elements like traditional patterns or symbols to make the cake feel even more personal.
4. Custom Cake Toppers
A personalized cake topper is an easy way to make the cake unique:
- Name and Message Toppers:
- Use acrylic or wooden toppers with the recipient’s name or a special message like “Magical Birthday” or “Dream Big.”
- Choose toppers in metallic gold, silver, or glitter finishes for a magical look.
- Custom Unicorn Horns:
- Design the unicorn horn to match the recipient’s preferences, such as adding their initials or a favorite pattern.
- Use unique materials like marbled Fondant for a more artistic effect.
- Photo Toppers: Include a small edible photo of the recipient or a family picture as part of the topper.
5. Inside Cake Surprises
Add an element of fun and surprise by personalizing the inside of the cake:
- Custom Cake Layers:
- Bake each layer in a different shade of the recipient’s favorite color, creating a surprise when slicing the cake.
- Hidden Candy Surprise:
- Hollow out a section of one layer and fill it with the recipient’s favorite candies or sprinkles.
- The hidden surprise will spill out when the cake is cut for a delightful effect.
- Flavor Preferences: Incorporate the recipient’s favorite flavors, such as chocolate, lemon, or red velvet, into the cake layers or frosting.
6. Personalized Embellishments
Add small, detailed embellishments that reflect the recipient’s personality:
- Edible Flowers:
- Use edible flowers with special significance in their favorite colors or blooms.
- Arrange the flowers elegantly around the mane or base of the cake.
- Custom Mane Details: Pipe initials, symbols, or tiny hearts into the unicorn’s mane using buttercream or royal icing.
- Favorite Characters or Themes: Incorporate small edible decorations inspired by their favorite characters, movies, or themes while keeping the overall unicorn design.
7. Coordinating with the Event
Tie the cake into the broader theme of the party or celebration:
- Matching Table Decor:
- Use the same colors or patterns from the party decorations on the cake.
- Coordinated Dessert Table: Surround the unicorn cake with matching cupcakes, cookies, or pops personalized to the recipient.
- Message on the Cake Board: Add a heartfelt message or memorable phrase on the cake board, such as “You’re One of a Kind” or “Magical Moments Ahead.”
8. Adding Personal Notes
Incorporate a sentimental element into the cake design:
- Inspirational Quotes: Write a short, inspiring quote on the cake, such as “Believe in Magic” or “Follow Your Dreams.”
- Special Dates: Include important dates, like birthdates or anniversaries, as part of the design.
- Custom Elements: Use symbolic elements representing the recipient, such as a favorite animal, hobby, or achievement.
By adding these personalized touches, your unicorn cake will be a beautiful, heartfelt, and meaningful centerpiece for the celebration. Let me know if you’d like additional ideas tailored to a specific occasion!
Tips for Perfecting Your Unicorn Cake
Common Mistakes to Avoid
Creating a unicorn cake can be a magical experience, but it’s easy to make mistakes that can compromise its appearance, taste, or stability. You can ensure a flawless and professional-looking unicorn cake by being aware of common pitfalls and learning how to avoid them. Here’s a detailed guide to help you steer clear of these common mistakes:
1. Uneven Cake Layers
- Why It Happens:
- Batter is not evenly distributed in the pans.
- Oven racks are uneven, causing the cake to bake unevenly.
- How to Avoid:
- Use a kitchen scale to weigh batter portions for uniform layers.
- Turn the pans halfway through baking to ensure they cook evenly.
- Before stacking, even out each cake layer using a serrated knife or a cake leveler.
2. Using Too Soft or Runny Frosting
- Why It Happens:
- Frosting hasn’t been chilled or was made with incorrect proportions.
- Excess liquid was added to achieve color or consistency.
- How to Avoid:
- Make sure your buttercream is firm enough to hold its shape. If it’s too soft, refrigerate it 10–15 minutes before use.
- Use gel food coloring instead of liquid to avoid altering the consistency.
- Add powdered sugar if the frosting is too runny.
3. Colors Bleeding or Fading
- Why It Happens:
- Excessive use of food coloring.
- Using low-quality food coloring that fades over time.
- Moisture from the frosting or environment causes colors to bleed.
- How to Avoid:
- Use high-quality gel food coloring for vibrant, long-lasting shades.
- Add colors gradually, mixing well between additions to achieve the desired hue.
- Allow piped decorations to dry slightly before adding additional elements.
4. Sliding Cake Layers
- Why It Happens:
- Frosting between the layers is too thick or soft.
- Layers aren’t leveled, causing instability.
- The cake isn’t chilled during assembly.
- How to Avoid:
- Apply a thin, even layer of frosting between each cake layer.
- Chill the cake between stacking and decorating for 15–30 minutes to firm up the frosting.
- Insert a skewer or dowel through the center of the cake for extra stability.
5. Overloading the Decorations
- Why It Happens:
- Adding too many elements like sprinkles, flowers, or fondant decorations can make the cake look cluttered.
- Heavy decorations can cause parts of the cake to collapse.
- How to Avoid:
- Plan the placement of decorations before adding them. Keep the design balanced and cohesive.
- Use lightweight decorations whenever possible, and support heavier elements with skewers or dowels.
6. Cracking or Collapsing FondantFondant
- Why It Happens:
- Fondant is rolled too thin or too thick.
- It dries out while being shaped or placed on the cake.
- How to Avoid:
- Roll Fondant to a thickness of about 1/8 inch for durability without being too heavy.
- Work quickly and keep unused Fondant covered with plastic wrap or in an airtight container to prevent it from drying out.
- Apply a thin layer of buttercream under the Fondant to help it adhere smoothly.
7. Horn and Ears Falling Over
- Why It Happens:
- The horn and ears aren’t adequately supported.
- They are made too large or heavy without structural support.
- How to Avoid:
- Insert toothpicks, skewers, or food-safe dowels into the horn and ears to anchor them securely into the cake.
- Let fondant or gum paste decorations dry and harden completely before placing them on the cake.
8. Crumbly or Dry Cake
- Why It Happens:
- Overmixing the batter, which overdevelops the gluten in the flour.
- Overbaking or using too high a temperature.
- How to Avoid:
- Stir the batter only until the ingredients are fully incorporated to prevent overworking the gluten.
- Check the cake for doneness 5 minutes before the recommended bake time by inserting a toothpick into the center. The cake is ready if it comes out clean.
- Check the oven’s accuracy using a thermometer.
9. Uneven or Cracked Frosting
- Why It Happens:
- The crumb coat wasn’t applied properly.
- The frosting wasn’t smoothed evenly or was too stiff.
- How to Avoid:
- Always apply a crumb coat to seal in crumbs before the final layer of frosting.
- Smooth the frosting using a bench scraper or an offset spatula. Dip the tool in warm water and wipe it clean for an ultra-smooth finish.
10. Rushing the Process
- Why It Happens:
- Skipping steps or not allowing enough time for chilling, drying, or setting.
- Assembling decorations while the cake is still warm.
- How to Avoid:
- Allow adequate time for each step, including cooling the cake, applying frosting, and adding decorations.
- Plan the design and timeline to ensure you aren’t rushed.
By avoiding these common mistakes, you can create a stunning unicorn cake that looks and tastes like a professionally made one. Let me know if you’d like tips for troubleshooting any specific issues!
Pro Tips for a Magical Finish
Adding the perfect finishing touches to your unicorn cake transforms it from a beautiful dessert into a magical centerpiece. These pro tips will help elevate your cake design, ensuring it is polished, professional, and full of whimsical charm. Here’s how to achieve that enchanting “wow” factor:
1. Achieving Smooth, Flawless Frosting
- Why It’s Important: Smooth frosting creates a clean canvas for your decorations, making the colors and textures pop.
- How to Do It:
- Crumb Coat: Apply a thin layer of frosting to seal in crumbs and smooth it with a bench scraper. Chill for 15–30 minutes before adding the final layer.
- Final Frosting Layer: Use an offset spatula or bench scraper to spread an even, thick layer of buttercream. Rotate the cake on a turntable for a seamless finish.
- Warm Tool Trick: Dip your scraper or spatula in warm water, then dry it off before smoothing the frosting for a polished look.
2. Perfecting the Unicorn Horn
- Why It’s Important: The horn is the cake’s focal point and must be stable and striking.
- How to Do It:
- Metallic Shine: Use edible metallic paints (gold, silver, or rose gold) to coat the horn. Apply multiple layers for a bold, reflective finish.
- Edible Glitter: Dust the horn with fine edible glitter while the paint is still slightly damp to add extra sparkle.
- Structural Stability: Insert a skewer or food-safe dowel through the horn to anchor it firmly into the cake.
3. Piping the Mane with Precision
- Why It’s Important: The mane is the unicorn cake’s most colorful and dynamic part, so precision and creativity are key.
- How to Do It:
- Use Multiple Piping Tips: Use star tips for rosettes, round tips for dots, and leaf tips for texture. This variety adds dimension to the mane.
- Blend Colors: Fill your piping bags with multiple frosting colors side by side to create a gradient or rainbow effect.
- Strategic Placement: Pipe the mane starting at the base of the horn and ears, flowing naturally down the side of the cake. Add accents around the base for balance.
4. Adding Sparkle and Shine
- Why It’s Important: Sparkle and shine are essential to capturing the magical essence of a unicorn.
- How to Do It:
- Edible Glitter: Dust edible glitter lightly over the entire cake or concentrate it on the horn, mane, and base for a magical glow.
- Luster Dust: Mix luster dust with clear alcohol or lemon extract to create a paintable shimmer. Apply it to the fondant decorations or buttercream accents.
- Sugar Crystals: Sprinkle-colored sugar crystals or coarse sanding sugar around the base of the cake for a sparkling touch.
5. Enhancing the Cake with Edible Decorations
- Why It’s Important: Adding edible details ensures every cake part is beautiful and delicious.
- How to Do It:
- Flowers: Use edible flowers, such as pansies, violets, or roses, to adorn the mane or base of the cake.
- Pearls and Beads: Add sugar pearls or edible beads throughout the mane for a touch of elegance.
- Sprinkles: Choose pastel or metallic sprinkles to scatter around the cake for playful details.
6. Highlighting the Unicorn’s Face
- Why It’s Important: The unicorn’s face brings personality and charm to the cake, making it visually engaging.
- How to Do It:
- Eyes and Lashes: Use black Fondant or edible markers to create closed eyes with delicate lashes. Ensure the lashes are symmetrical for a balanced look.
- Blushing Cheeks: Add pink fondant circles or a dab of pink buttercream below the eyes to give the unicorn a sweet, blushing appearance.
7. Creating a Stunning Base
- Why It’s Important:
- The base ties the design together, providing a polished finish.
- How to Do It:
- Ribbon Trim: Wrap a pastel or metallic ribbon around the cake board for a clean and elegant touch.
- Buttercream Border: Pipe a border of stars, shells, or swirls around the base of the cake for a cohesive look.
- Sprinkle Accent: Scatter sprinkles or edible glitter around the cake board to reflect the magical theme.
8. Maintaining Structural Stability
- Why It’s Important: A stable cake ensures your decorations stay intact and the cake looks flawless throughout the celebration.
- How to Do It:
- Dowel Support: Use food-safe dowels or skewers to support multiple layers or heavy decorations.
- Chilling: Chill the cake between steps to firm up the frosting and ensure stability.
- Proper Transport: Use a sturdy cake board and box for transport, keeping the cake cool until serving time.
9. Personalizing the Design
- Why It’s Important: Personal touches make the cake unique and memorable.
- How to Do It:
- Custom Colors: Incorporate the recipient’s favorite colors into the mane or decorations.
- Name and Message: Add the recipient’s name, age, or a special message with fondant letters or piped buttercream.
- Themed Additions: Incorporate elements like stars, rainbows, or hearts to reflect the recipient’s personality or the event theme.
10. Capturing the Final Presentation
- Why It’s Important: A stunning display enhances the cake’s magical appeal and makes it photo-ready.
- How to Do It:
- Cake Stand: Display the cake on a decorative stand to elevate its presence.
- Lighting: Use fairy lights or soft lighting to create a magical ambiance.
- Backdrop: Position the cake in front of a themed backdrop for perfect photos.
By following these pro tips, your unicorn cake will have a magical finish that amazes everyone. Let me know if you’d like more specific guidance on these points!
Time-Saving Shortcuts
Creating a stunning unicorn cake can be a time-intensive process, but with some clever shortcuts, you can save time without compromising quality or appearance. These tips are perfect for busy bakers or last-minute preparations, helping you achieve professional results efficiently. Here’s how you can simplify the process:
1. Use a Boxed Cake Mix
- Why It Saves Time: Preparing cake batter from scratch can be time-consuming, especially if making multiple layers. Boxed cake mixes are a reliable and quick alternative.
- How to Use It:
- Choose a high-quality boxed mix in a flavor that matches your theme (e.g., vanilla, chocolate, or confetti).
- Customize the mix by adding extras like vanilla extract, almond extract, or food coloring to enhance flavor and appearance.
- Pro Tip: Substitute milk for water and melted butter for oil to give the boxed mix a richer, homemade taste.
2. Pre-Made Frosting
- Why It Saves Time: Making buttercream frosting from scratch requires time for preparation and cleanup. Store-bought frosting is ready to use right out of the container.
- How to Use It:
- Whip the pre-made frosting with a hand mixer to improve its texture and make it easier to spread or pipe.
- Add gel food coloring directly to the store-bought frosting to create vibrant colors for the unicorn mane.
- Pro Tip: Look for high-quality frosting brands with rich flavors and smooth consistency.
3. Pre-Made Decorations
- Why It Saves Time: Crafting fondant decorations like horns, ears, and flowers can be meticulous. Pre-made decorations eliminate the need for shaping, drying, and painting.
- How to Use It:
- Purchase pre-made edible unicorn horns, ears, and eyes from baking supply stores or online retailers.
- Choose ready-made fondant flowers, sugar pearls, or edible glitter for additional accents.
- Pro Tip: If you want a personal touch, enhance pre-made decorations with edible glitter or luster dust.
4. Pre-Colored Fondant
- Why It Saves Time: Coloring fondant manually takes time and effort, especially when mixing multiple shades. Pre-colored Fondant ensures consistent and vibrant colors without the mess.
- How to Use It:
- Purchase Fondant in your desired colors, such as pastel shades for the unicorn mane or gold for the horn.
- Roll it out and use it directly for decorations or covering the cake.
- Pro Tip: Keep a small supply of white Fondant on hand to mix and adjust colors if needed.
5. Simplified Piping Techniques
- Why It Saves Time: Intricate piping can be time-consuming and may require practice. Using basic techniques reduces preparation time while still achieving a beautiful design.
- How to Use It:
- Stick to simple rosettes, swirls, and dots using a star or round piping tip.
- Use a single piping bag with multiple colors of frosting for a multi-toned effect without needing separate bags.
- Pro Tip: Practice piping on parchment paper first to get comfortable with your technique.
6. One-Tier Cake Option
- Why It Saves Time: Multi-tier cakes require more layers, frosting, and assembly time. A single-tier cake is quicker and easier to prepare while still looking stunning.
- How to Use It:
- Bake a single large or two smaller layers for a shorter cake.
- Focus your efforts on decorating the top with a horn, ears, and mane for maximum impact.
- Pro Tip: Use a tall cake pan to create a single-tier cake that looks substantial and dramatic.
7. Ready-to-Use Cake Layers
- Why It Saves Time: Baking cake layers from scratch can take hours. Ready-to-use or frozen cake layers can significantly cut down on prep time.
- How to Use It:
- Purchase pre-baked cake layers from a bakery or grocery store.
- Thaw frozen layers and level them before stacking and frosting.
- Pro Tip: Brush the layers with a simple syrup or flavored liquid to enhance moisture and flavor.
8. Quick Coloring Techniques
- Why It Saves Time: Coloring batter or frosting manually can be tedious, especially for multiple shades.
- How to Use It:
- Divide the batter or frosting into portions and use gel food coloring for fast and vibrant results.
- Mix colors in disposable bowls to avoid additional cleanup.
- Pro Tip: For the frosting, use pre-filled color cartridges or pens to add intricate details without mixing multiple piping bags.
9. Focus on Key Decorations
- Why It Saves Time: Adding too many decorative elements can overwhelm your timeline. Prioritizing the essentials ensures a magical look without overworking yourself.
- How to Do It:
- Concentrate on the horn, ears, and mane, as these are the signature elements of a unicorn cake.
- If time is short, simplify or omit additional decorations, such as borders or side designs.
- Pro Tip: Use edible glitter or metallic dust to quickly enhance the design without needing extra elements.
10. Use a Turntable
- Why It Saves Time: A turntable allows you to frost and decorate your cake more efficiently by keeping it accessible from all angles.
- How to Use It:
- Place the cake on the turntable and spin it as you apply frosting or pipe decorations.
- Use one hand to pipe or spread while turning the table with the other.
- Pro Tip: Look for a turntable with a locking feature to stabilize it when needed.
11. Chill Between Steps
- Why It Saves Time: Chilling the cake helps set the frosting and decorations, making the assembly process smoother.
- How to Use It:
- After applying the crumb coat, refrigerate the cake for 15–20 minutes to firm it up.
- Chill the cake after stacking the layers and again before adding the final decorations.
- Pro Tip: Work on other elements, such as decorations, while the cake chills to maximize efficiency.
By incorporating these time-saving shortcuts, you can simplify the unicorn cake-making process without sacrificing its magical and whimsical appearance. Let me know if you’d like more tips or tricks for specific steps!
Creating a stunning unicorn cake is not just about baking a dessert but crafting a magical centerpiece that brings joy to any celebration. With this step-by-step guide, you’ve learned how to bake, decorate, and personalize a unicorn cake that is as whimsical as delicious. Whether you’re preparing it for a birthday, a themed party, or a special occasion, your unicorn cake will surely leave everyone amazed.
Creativity and attention to detail are the keys to a perfect unicorn cake. Don’t be afraid to experiment with colors, flavors, and decorations to make it unique. With a bit of patience and practice, your unicorn cake will look magical and taste like a dream.
Now, it’s time to roll up your sleeves, gather your tools, and bring your cake vision to life. Share your masterpiece with friends and family, and let the magic of your unicorn cake light up the party!